Bûche de Noël - Centrepiece DIY

Christmas is going to be a little different this year! Some of us may not get to reunite with our families and gather around the table like we usually do, so we just have to work a little harder to bring out the festive spirit! I don’t know about you, but I’ve been going extra hard on the Christmas music, baking and crafting, it helps to pass the time and truly brings me joy!
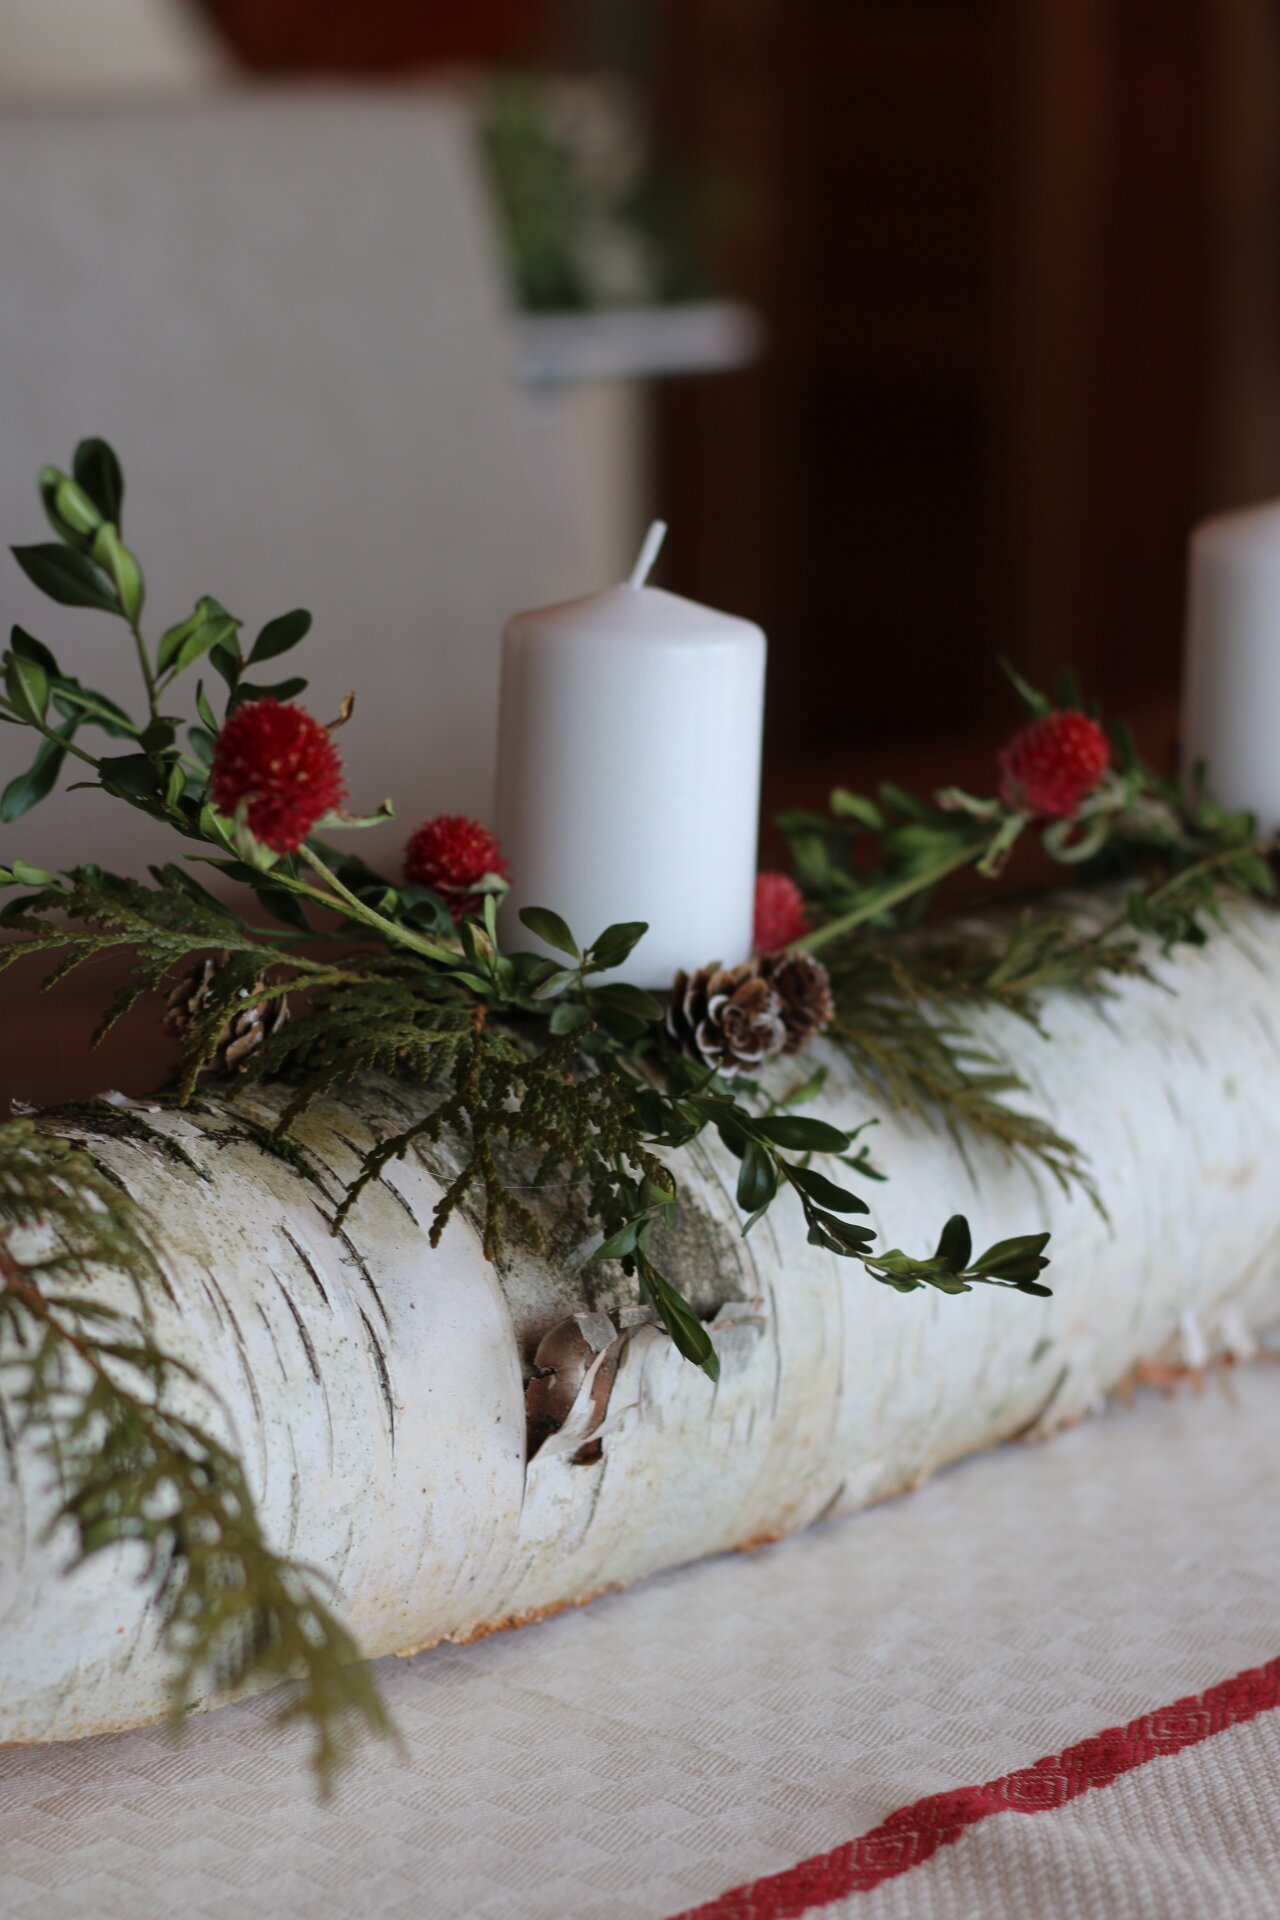
This Christmas log is one of the many DIYs that are currently embellishing my home! I made this one at the cottage using materials what we found outside, it’s a fun to bring the outdoors in and such a great centrepiece to spruce up the table, even if it’s only set for 2 ;)


For this DIY you’ll need the following materials:
Piece of birch (mine is cut to 28 inches)
3 small pillar candles
Hot glue gun
Hammer
Finishing nails
Pruning shears
Festive greens (I used dried boxwood and fresh cedar for a mix of texture)
Any other natural decorative elements such as pine cones & dried flowers

Prep:
To start, skim a little bit off the bottom of the log to help it from rolling on the table, you can do this with an axe or hatchet.
Determine where your candles will go and nail in 3 finishing nails, leaving about an inch and a half sticking out.
The candles I found at the dollar store already had small hole on the bottom, but if yours don’t, you can heat up the nail using a lighter or match and melt a hole by sliding the candle onto it.

Decorate:
Cut the greens to the desired length and start attaching them to the log. First I arranged the cedar to frame both sides of each candle with hot glue, hiding the glued ends underneath it.
I wanted the boxwood to stick up to add height and drama, so I made small holes with a finishing nail and glued the stem in the hole which helps it stay up.
I repeated this step with these cute red flowers I found at a farmer’s market!
Lastly I glued 2-3 pine cones around each candle, making sure to cover any empty spaces or visible glue dots!


You’re all done! I’ve kept mine on the table for the last 2 weeks, it will stay nice for a while, you can also mist the leaves with a spray bottle if you want them to last extra-long! Now all you have to do is light it up and enjoy your holiday dinner!
I hope you’ll be inspired to get crafty, sending all the love and joy your way for this Holiday!
Kisses
XX Cami